Initial Cavicam Setup
Important
The following steps should be completed for each Raspberry Pi / Cavicam in turn with all other Pies turned off. All the Pies initially have the same wifi name, so only one Pi can be configured at a time otherwise you won’t know which one you are connecting to. Once they’re all configured, they can be on at the same time.
Step 1 - Turn ON the Raspberry Pi
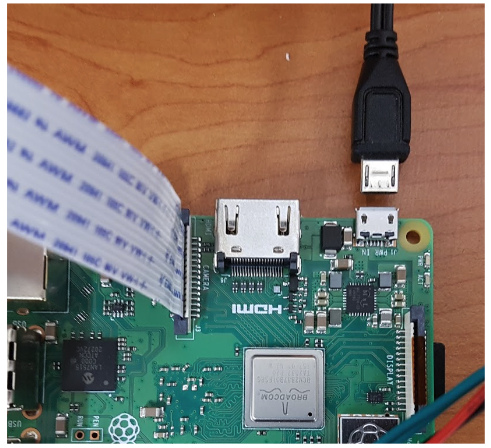
Turn on the Raspberry Pi by connecting the power supply (either a micro USB or USB-C connector cable).
Step 2 - Join the Cavicam Network
From an external computer with wifi capability, select cavicam or cavicam-x from the list of available wifi networks and connect using the default password raspberrypi123!.
Cavicam not appearing in the wifi list?
See troubleshooting for possible causes and solutions.

Note
To clarify, this screenshot shows the list of available wifi networks on an Apple Macbook and shows that the computer is currently connected to the network “Telstra…”. This shows the system before it has connected to the cavicam network, we want to connect to the “cavicam” network to access the caviconsole.
Step 3 - Access the Cavicam web app (called the Caviconsole)
Note
This step should be completed on the device connected to the cavicam wifi network. For example, if you connected to the cavicam network using your laptop, on your laptop open the browser and connect to the address below.
In a browser (preferably chrome), enter the address http://caviconsole.wlan:6060 to access the remote control software on the Pi (called the “caviconsole”).
If unable to connect, try http://192.168.44.1:6060.
Step 4 - Expand the File System
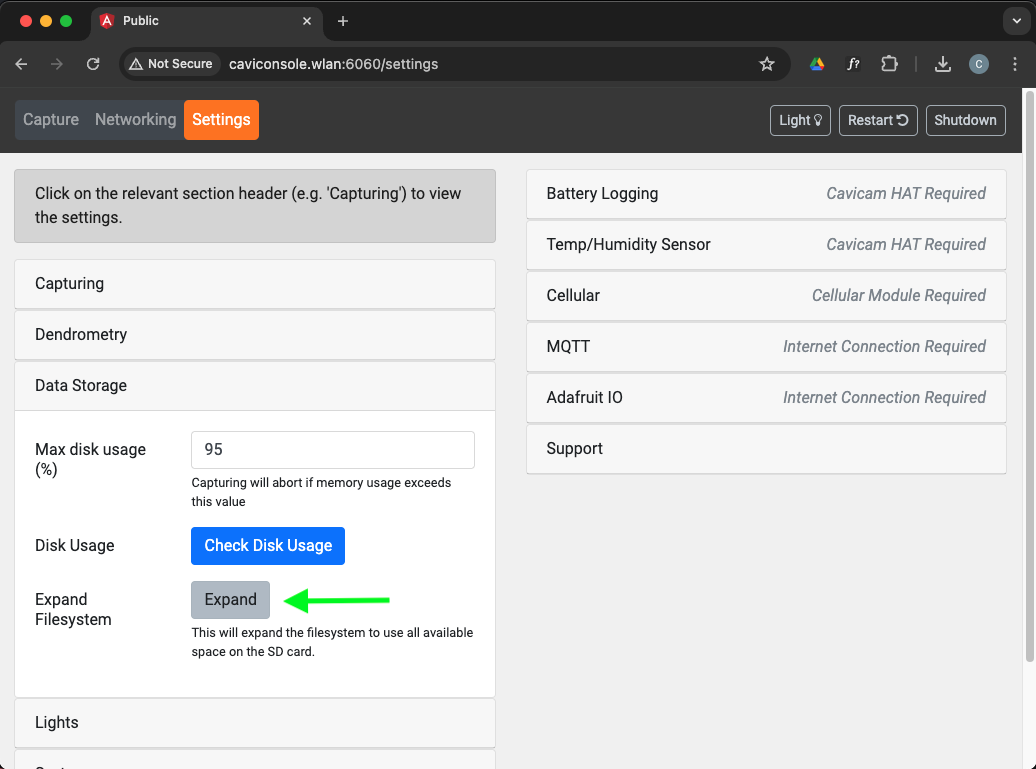
After copying a new cavicam OS image to a Micro SD card, the filesystem must be expanded so that all of the memory on the card becomes available. This only needs to be done once.
From the Settings tab at the top of the caviconsole, expand the Data Storage section (click on the title) and click the Expand button and wait for the Raspberry Pi to restart. Once restarted, reconnect to the cavicam wifi network and open up the caviconsole again.
Step 5 - Set the Timezone
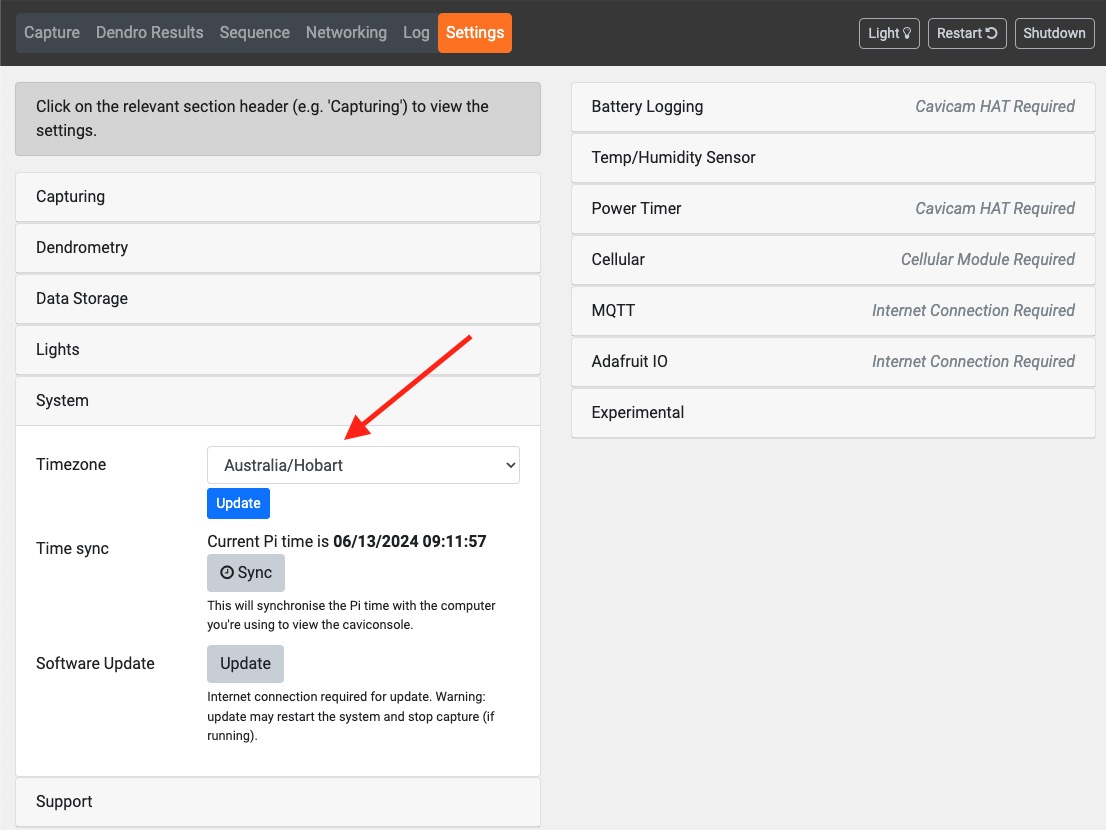
From the Util tab, select the appropriate timezone for your region from the Timezone dropdown and click Update.
Step 6 - Set a Unique Hostname
From the Networking tab, enter a unique name for the cavicam in the Hostname field. A unique name is suggested.
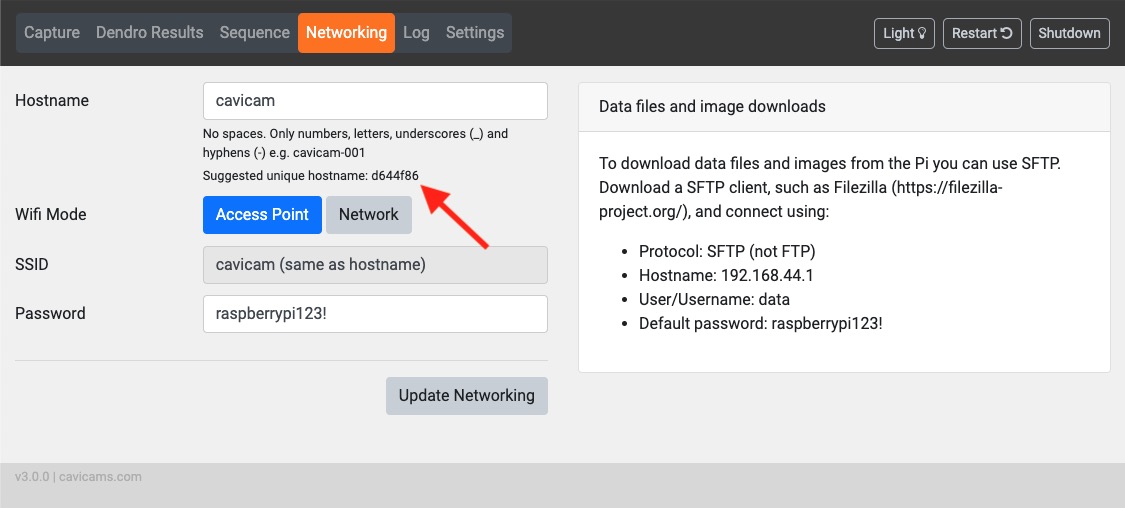
Click Update Networking and wait until the Raspberry Pi restarts.

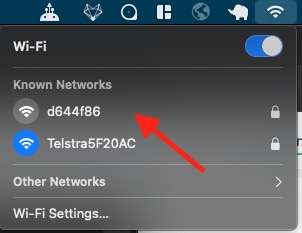
Once the pi has restarted, the new name should appear in the list of available wifi networks. Here as an example we set the hostname to “d644f86” which now appears in the wifi list. Enter the default password “raspberrypi123!”. On a mac, look in Other Networks the first time you connect.
Suggestion
Write the new name on some tape on the Cavicam or on the Raspberry Pi case (if using - recommended).
Step 7 - Set Bottom/Base Light
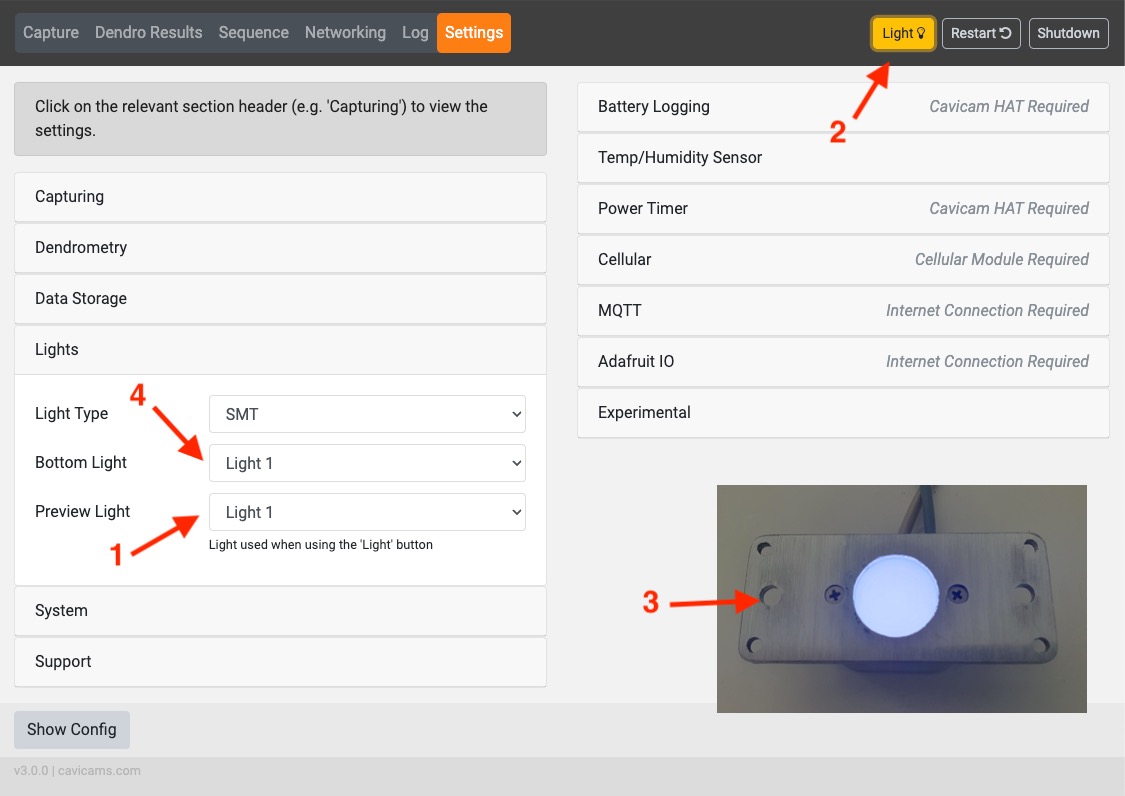
Dendrometry involves backlighting the sample with the bottom light to cast the sample in shadow. Depending on how the cavicam wires were connected to the Pi, Light 1 or Light 2 might be the bottom light, so we’ll first need to work out which one is which.
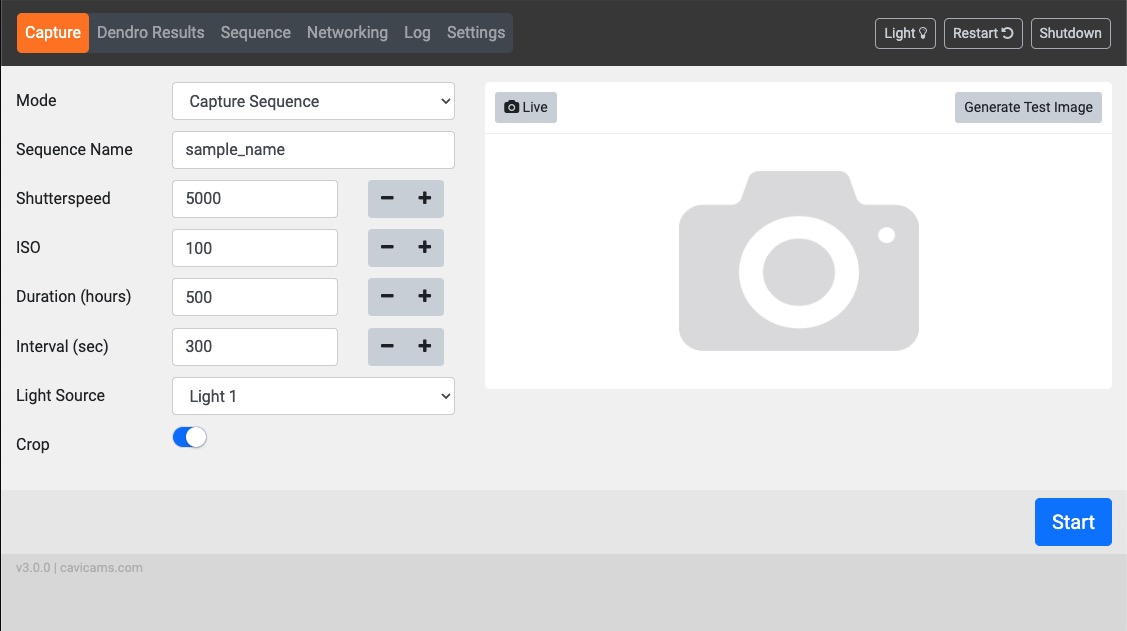
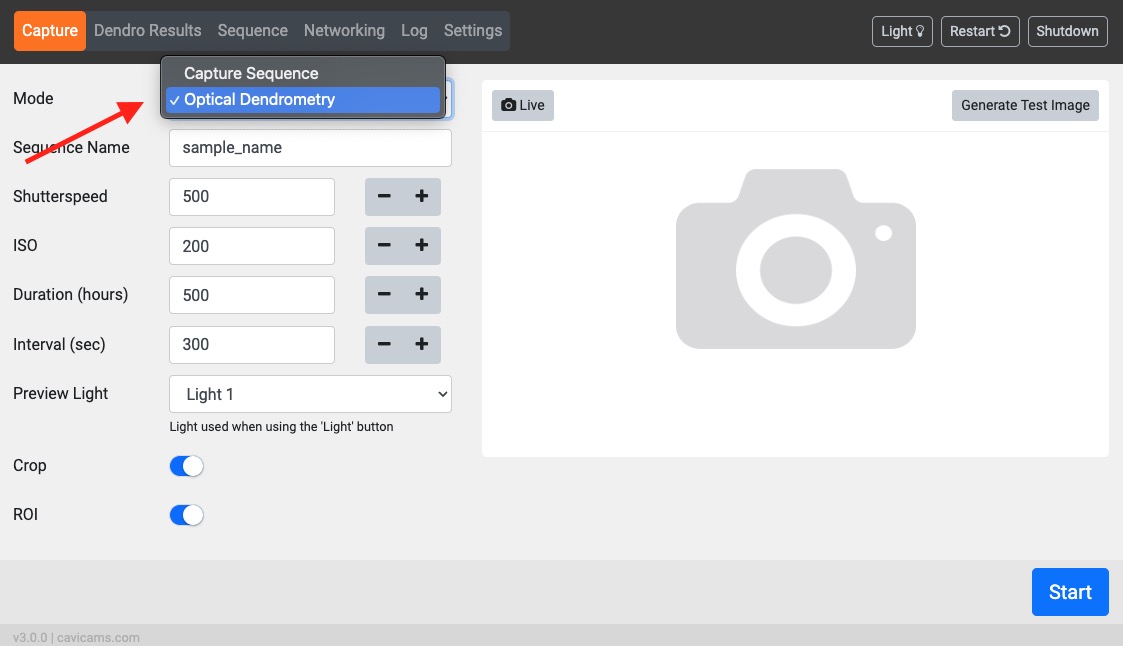
From the Capture tab, change the Mode to Optical Dendrometry
With dendrometry mode enabled, click the Settings tab and expand the Lights section.
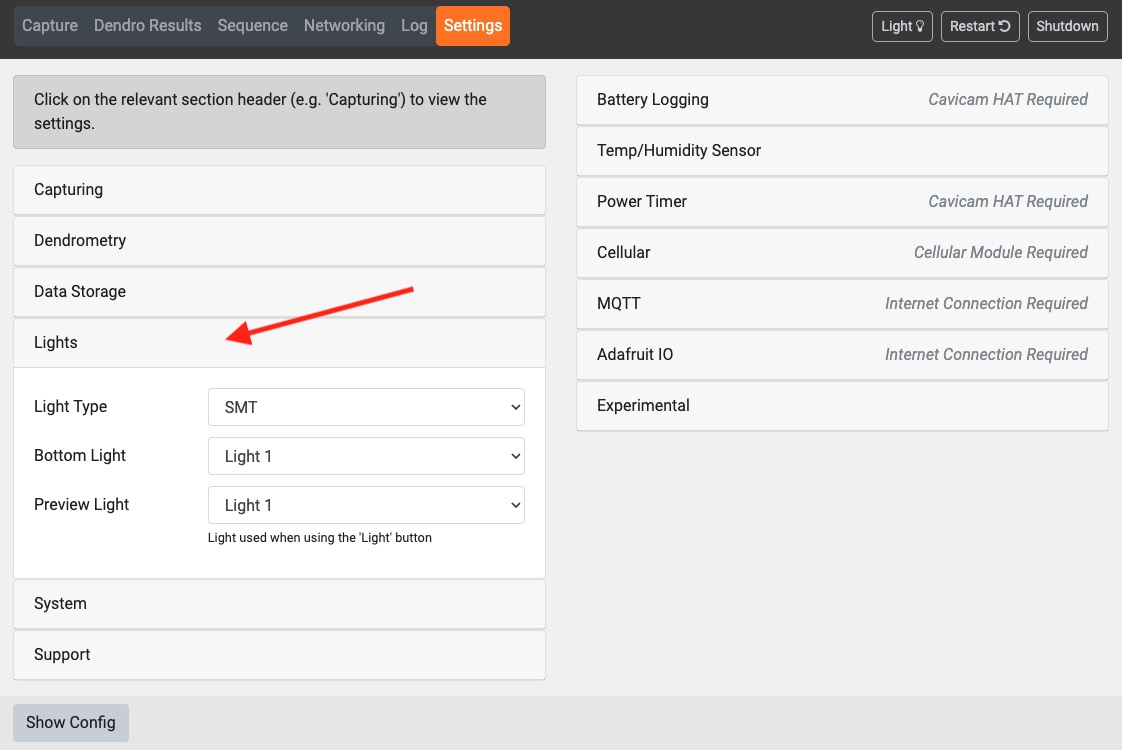
The light selected as the Preview Light (either Light 1 or Light 2) is the light that turns on when you click the Light button. By changing this setting (and ensuring that you Save Changes after updating) and looking at the base on the cavicam while toggling the Light ON using the Light button at the top right of the caviconsole, you can determine whether Light 1 or Light 2 is the bottom/base light. Update the Bottom Light setting accordingly.
Step 8 - Enable temperature and humidity sensor (optional)
Temperature Humidity Sensors
Temperature and humidity sensors can be purchased from https://www.cavicams.com/purchasing
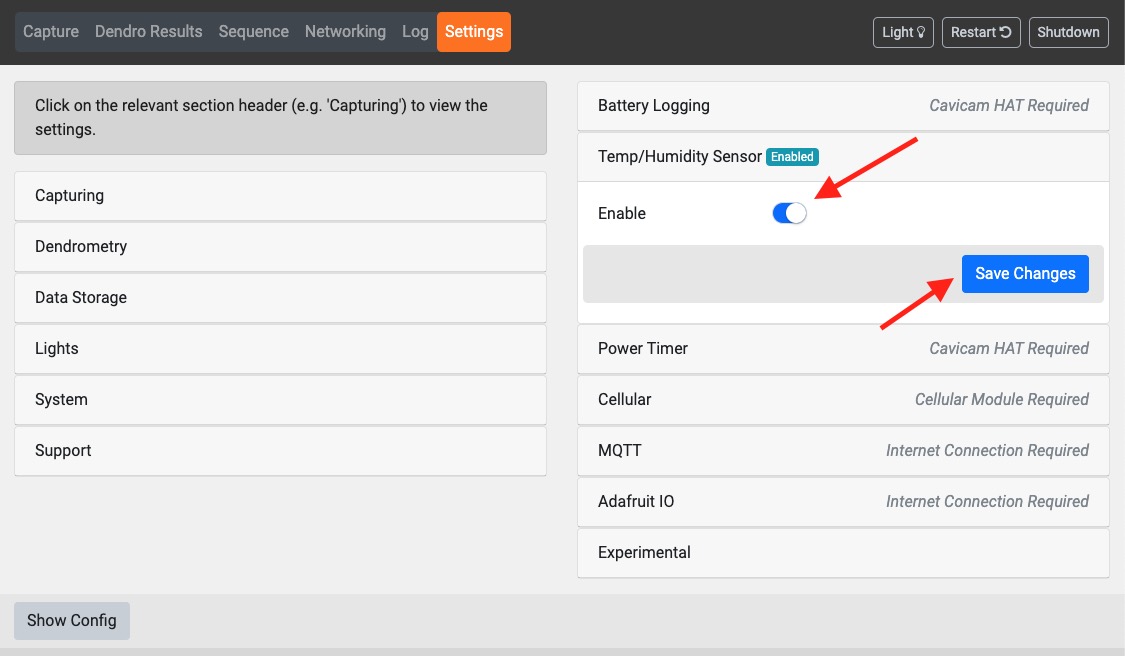
If you have a temperature and humidity sensor, expand the Temp/Humidity Sensor section in Settings and toggle Enable. Don’t forget to Save Changes.
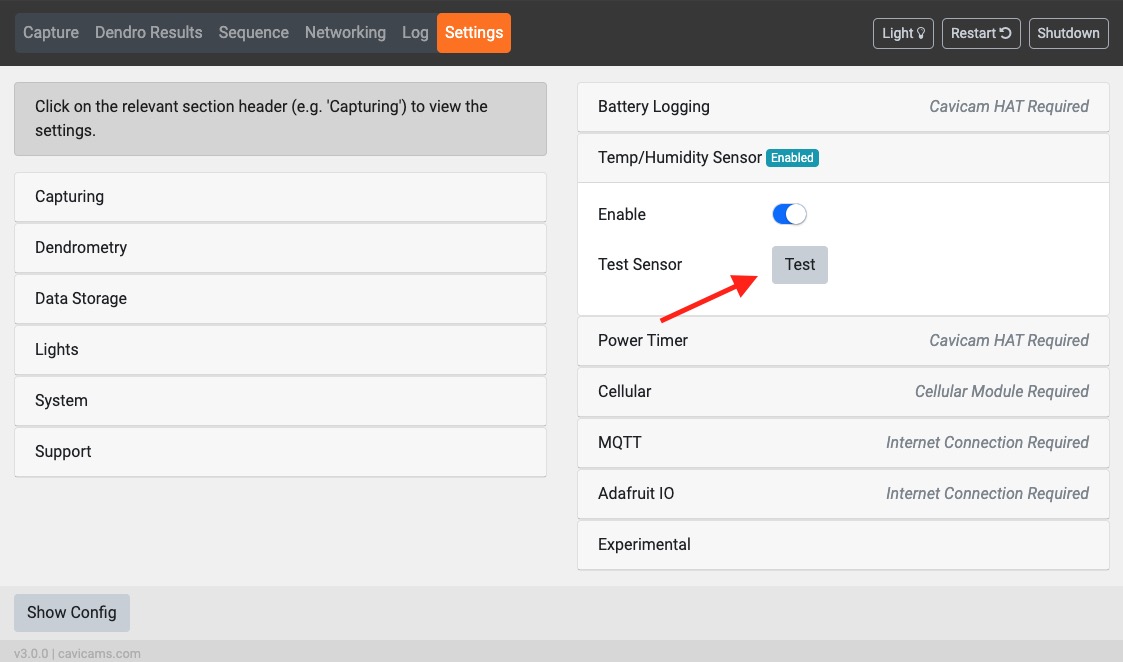
Test the sensor to confirm it is operational.
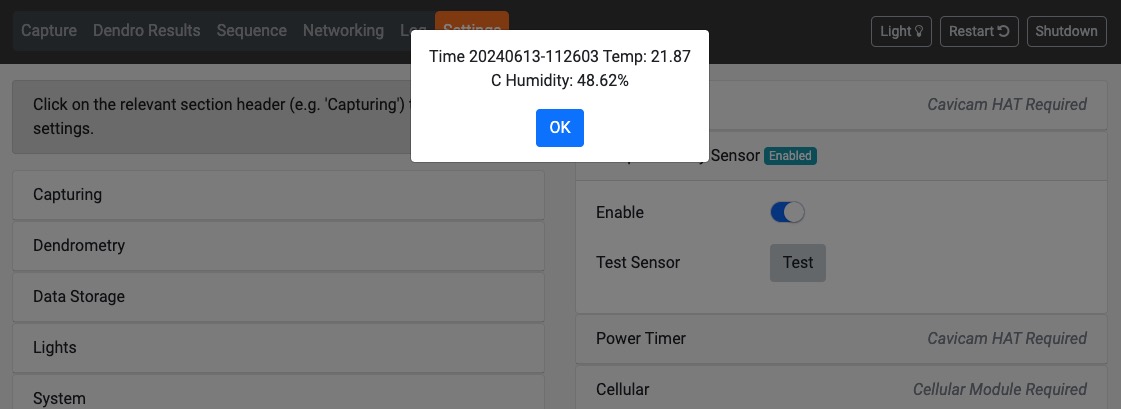
If the sensor isn’t working, check the cable connections, restart the Pi (using the Restart button at the top-right of the caviconsole) and try again.