Accessing Images and Data

The steps below assume you have saved the images and data to the Micro SD card i.e. selected “/home/pi/captures” (or a custom directory) as the Output Directory option in the Captures tab. See the section Accessing from USB Memory Stick for accessing data and images on an external memory stick.

Step 1 - Install an FTP client

Install an FTP client on the computer you want to download the images and data to.

Filezilla is recommended as a good (and free) FTP client that works on both Mac and Windows.

https://filezilla-project.org/

Make sure you download the correct version!

Filezilla offers two downloads: an FTP client and an FTP server. The option you want is the Filezilla Client (the button on the left).
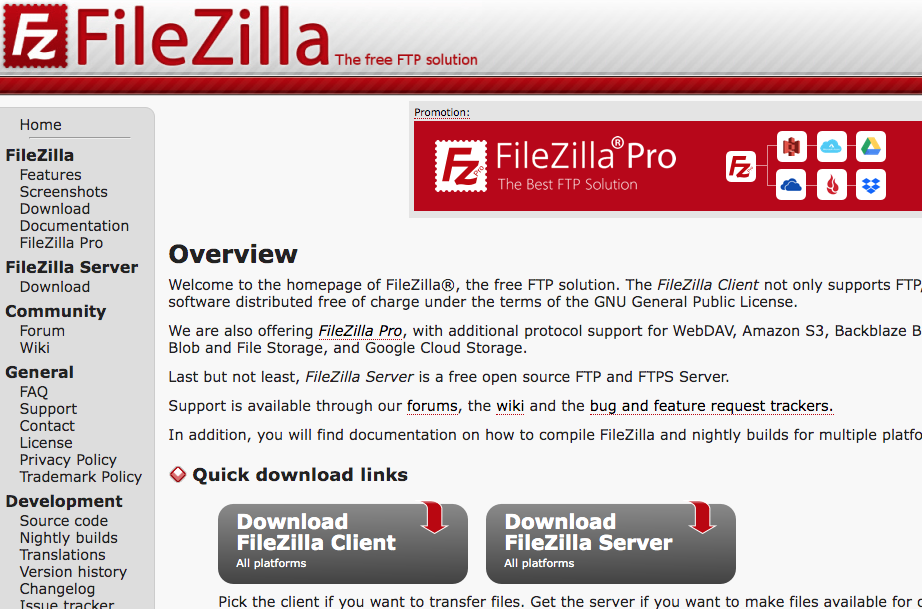
Filezilla FTP client

Step 2 - Create Wifi Connection to Cavicam

See Accessing the Caviconsole for instructions on connecting to the Pi (skip the step to to access the caviconsole itself).

Step 3 - Connect FTP Client to Cavicam

Open Filezilla Client and click the Sites Manager icon at the top left of the application.
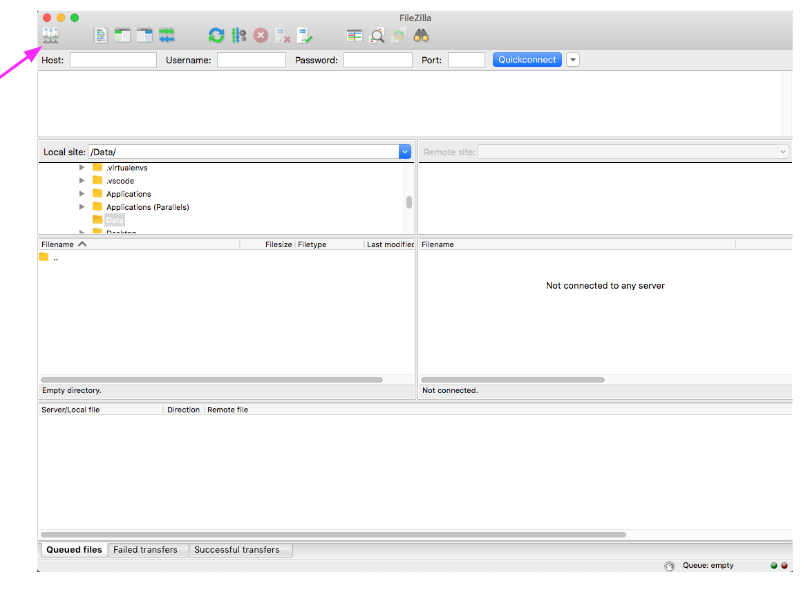
Open the Sites Manager in the Filezilla FTP client

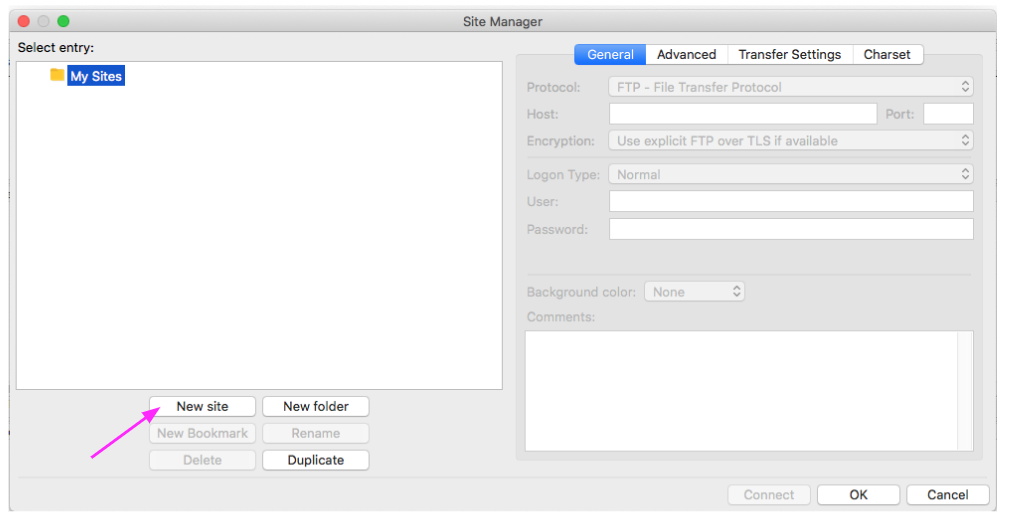
Add a new site in the site manager:

Create a new site in the Sites Manager

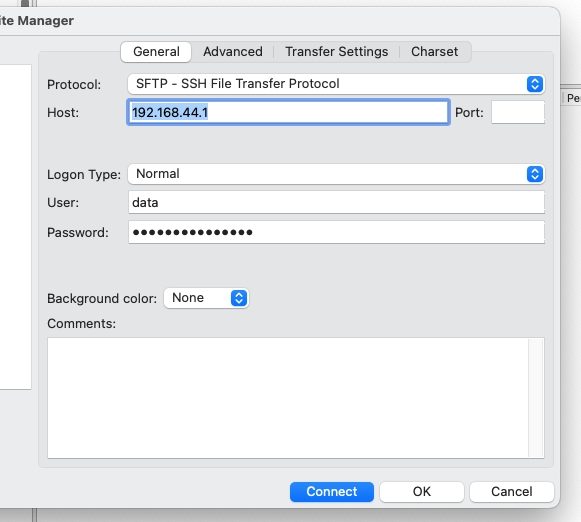
Provide a name for the site (e.g. “Cavicam”) and select SFTP (not FTP) as the Protocol.
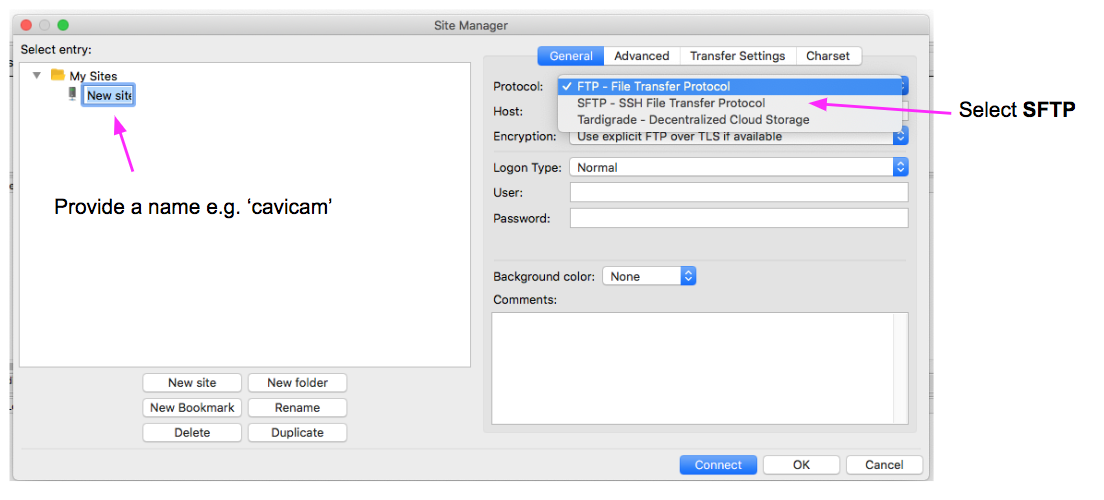
Configure site settings

Enter the following Host, User and Password details and click Connect.

Option

Value

Host

192.168.44.1

User

pi

Password

whatever the password is set to on the Networking tab, the default is raspberrypi123!

Configure site settings continued

Step 4 - Finding the Files

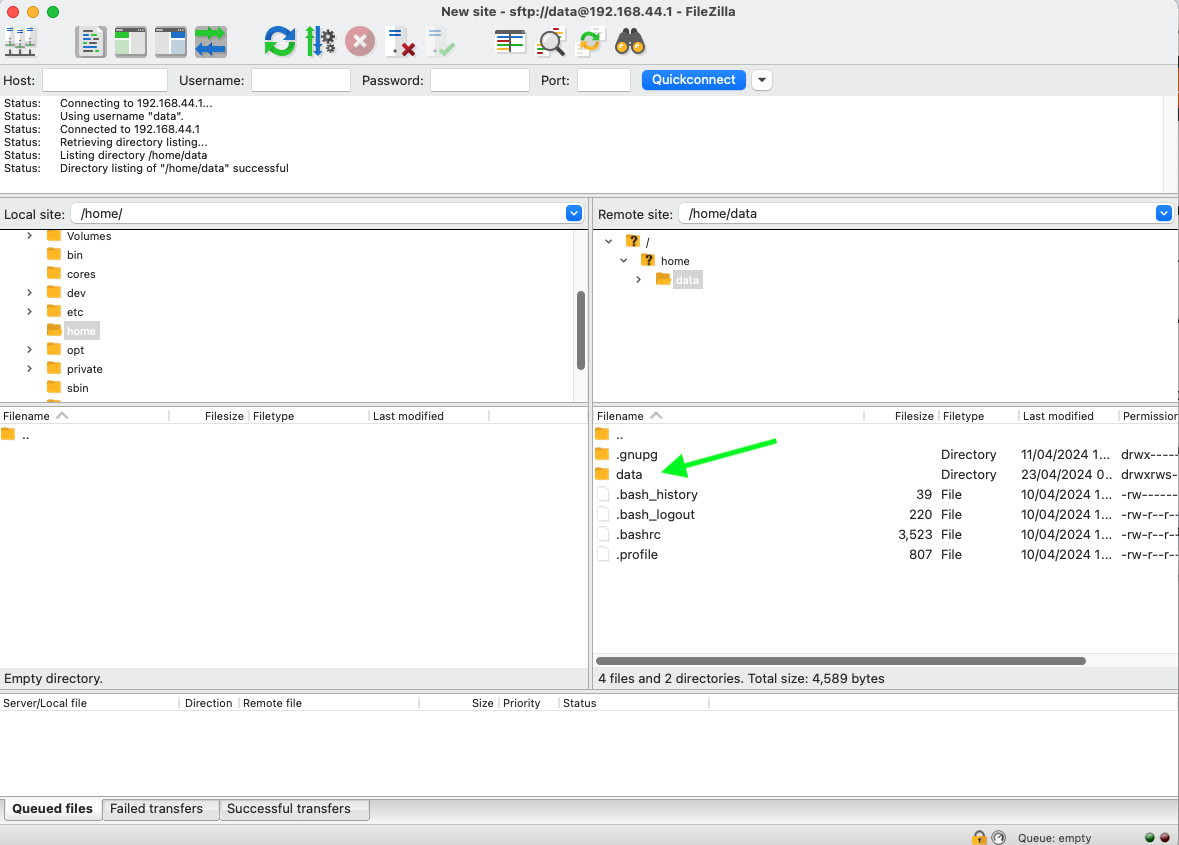
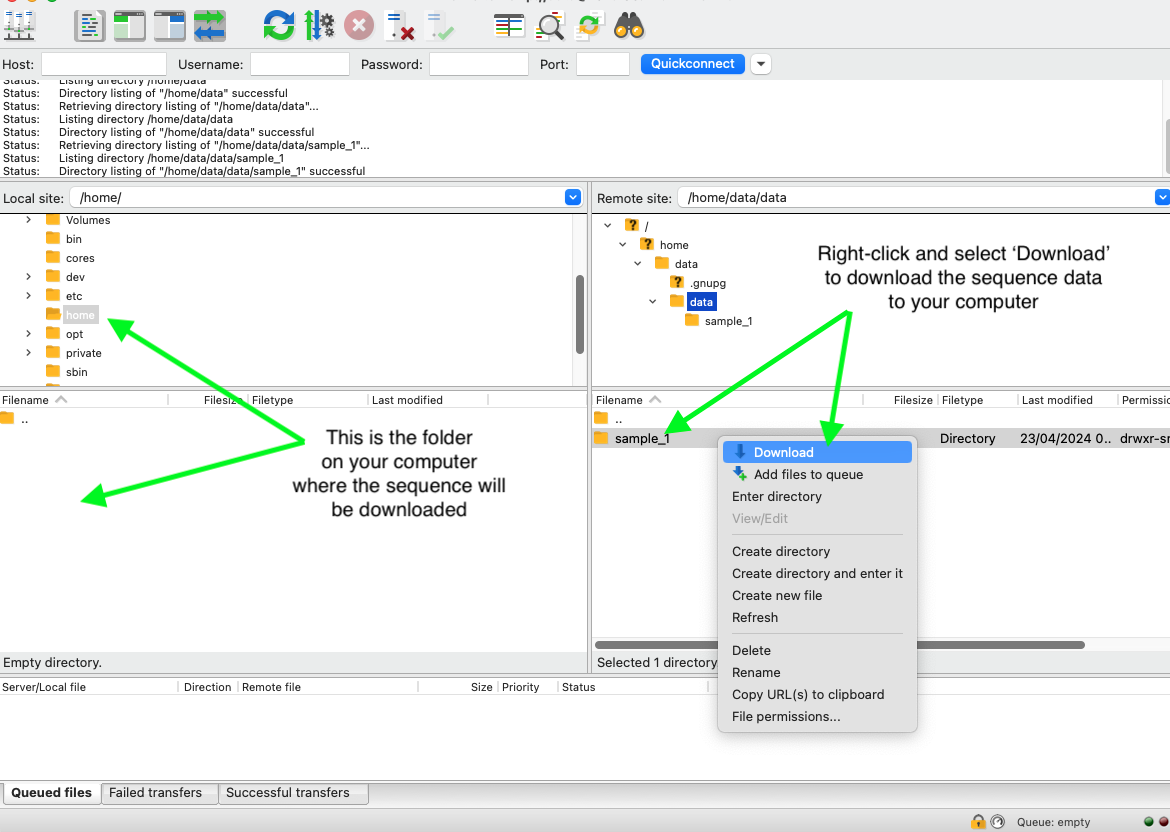
Once connected, the right side file and folder browser shows the files and folders on the Pi and the left side shows the files and folders on your computer:
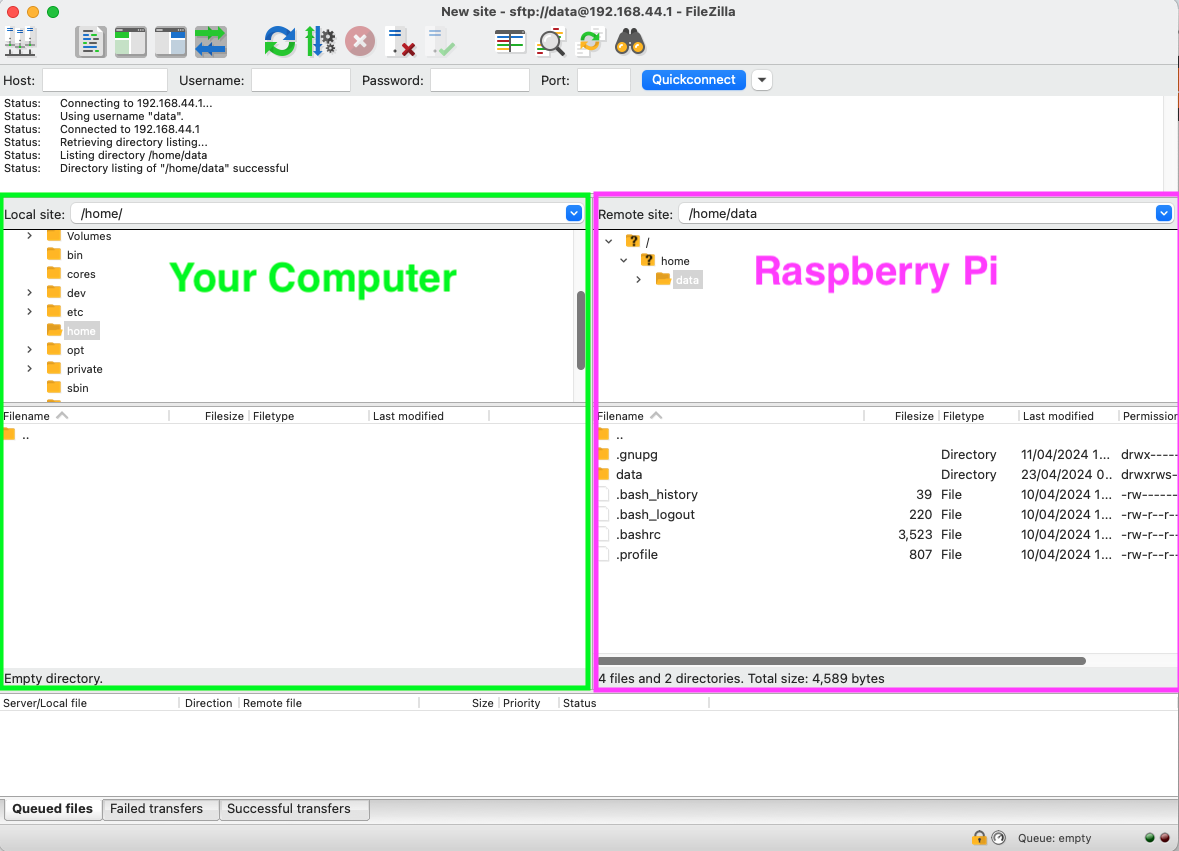
Filezilla Client layout explained

Use the file and folder browser on the right side (the Raspberry Pi) to navigate to the /home/pi/captures directory

Finding the Captures folder

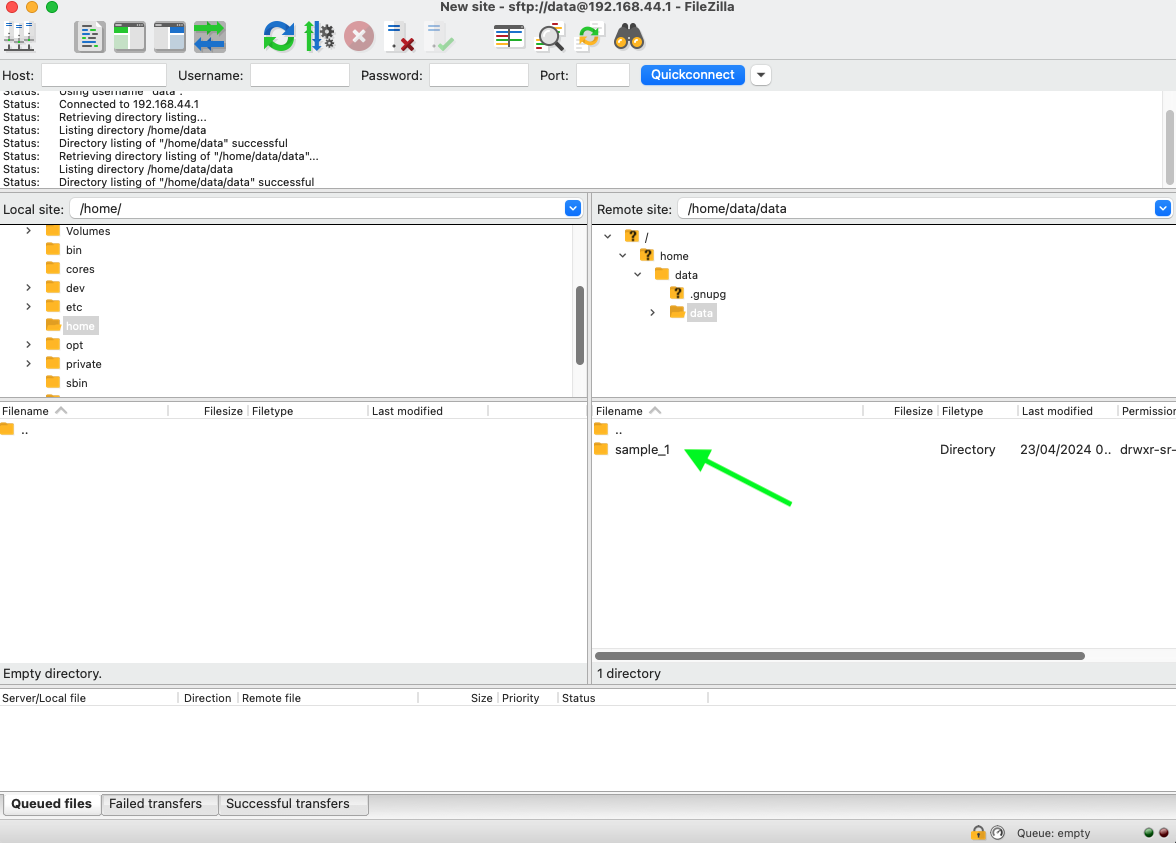
In the captures directory, each sequence will have its own folder based on the sequence name:

Finding the sequence folder(s)

Navigate through the file system on the left hand side (the file system of your computer) and find a suitable place to download the sequence. Right-click the sequence folder (on the Pi file system) and select Download to download all the images and data to the directory currently selected on the left side. You can also drag the folder over.

The sequence folder contains:

  1. Original images in the root of the sequence folder

  2. Processed images in the processed/ directory (for optical dendrometry)

  3. Log file (log.txt) in the root of the sequence folder

  4. Data file (data.csv) in the dendro folder within the sequence folder (only for optical dendrometry). Columns are timestamp, width (pixels, ignore), width (microns, ignore), area (pixels, use this), ROI height (pixels), ROI width (pixels).

Downloading the sequence folder to the local file system.

Accessing from USB Memory Stick

If currently capturing, stop the sequence and then remove the USB stick from the Pi.

Stop capturing Removing USB stick

Insert into personal computer and access files as normal e.g. copy from the USB stick to a folder on your local file system. Once complete, re-insert into the Raspberry Pi and restart capturing.

Deleting Sequences

  • If saving images and data to a USB stick, delete the folders as necessary using the file manager on your local computer.

  • If saving images and data to the /home/pi/captures folder, or a custom folder on the Pi

    • Use FTP - simpler, but slower

    • SSH - more advanced, but faster

Whatever the method, first create a connection to the Pi over wifi (as above).

Deleting Sequences Using FTP

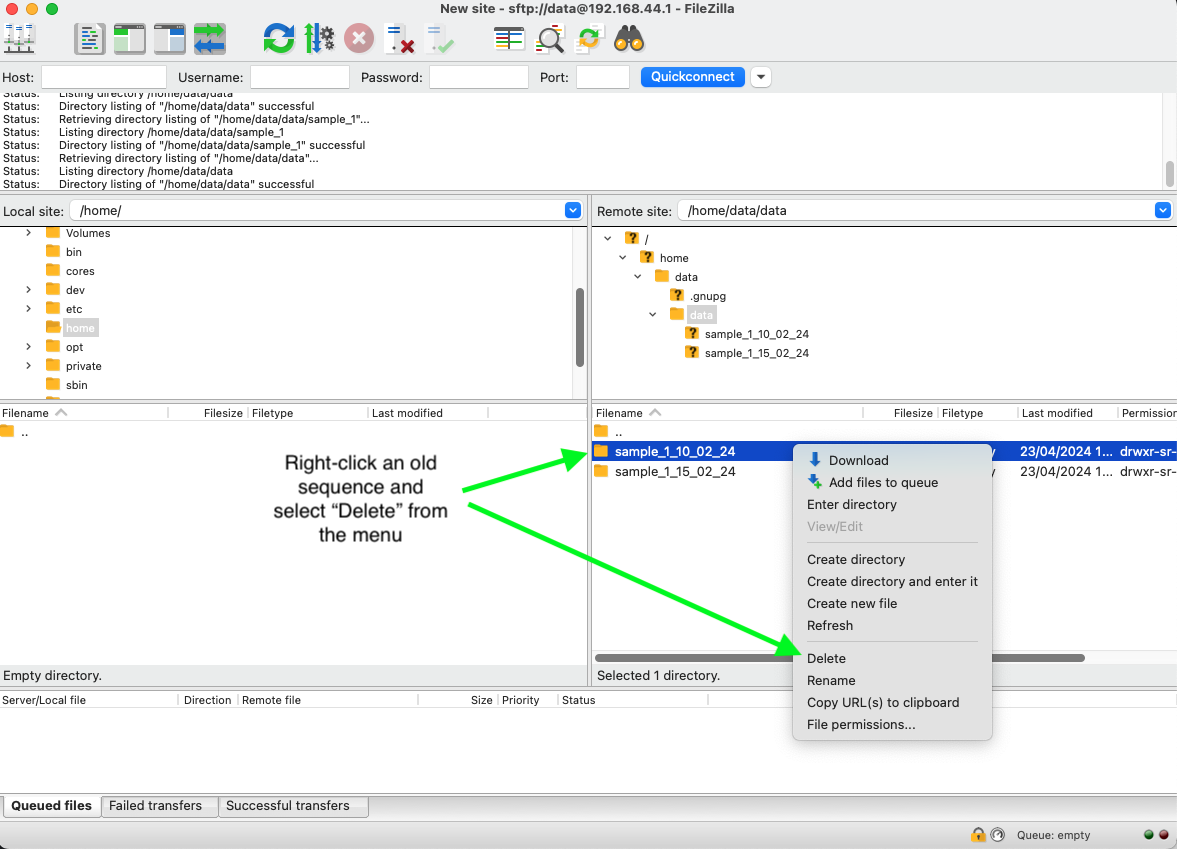
Use Filezilla (or other FTP client) to navigate to the captures folder. Right-click old sequence folders and select Delete

Delete folders using the FileZilla FTP Client

Deleting Sequences Using SSH

There are alternative methods of connecting over SSH for mac/unix-based operating systems vs windows.

Connecting over SSH from a Mac or other Unix-based operating system (e.g. Ubuntu)

Open the Terminal application

  • On Mac: Other in applications, or CMD-Space and type Terminal

  • For Ubuntu: in the Utilities folder in applications

From the terminal, connect to the Raspberry Pi using the SSH command:

ssh pi@192.168.44.1

Confirm or agree to any questions and when prompted enter the password configured in the Network tab of the caviconsole, the default password is raspberrypi123!

Connected to the Pi over SSH

Connecting over SSH from Windows

Download, install and open PuTTY - https://www.putty.org

Enter 192.168.44.1 for the host and click Open

PuTTY configuration

When prompted, enter the username pi and the password raspberrypi123!

Connected the cavicam using PuTTY

Commands to delete sequences

Once connected, use the cd command to change to the /home/pi/captures directory.

Note

Don’t type [enter] in the examples below, just press enter!

cd /home/pi/captures [enter]

Use ls command to list the sequences

ls [enter]

Use the rm command to delete a sequence by name

rm -r [sequence folder name] [enter] 

e.g.

rm -r eucalypt_25022020

Type exit to exit the SSH session

exit [enter]

Want to learn more?

Beginners guide to the terminal can be found here: https://medium.com/@grace.m.nolan/terminal-for-beginners-e492ba10902a